Although QuickLog is pretty easy to use, there are one or two features that are a bit more complicated. Importing ADIF files is one of them. So, in this post I will discuss importing them into HAM QuickLog using your Mac computer.
You can import Adif files in QuickLog in 2 ways. If you go in the app, to the menu on the top, second from the left. The one with the box and arrow, you can tap on import.
There you can “import from iTunes” and “Import from URL”. “Import from URL” we will discuss in another post.
Apple decided some time ago that they would not use and support the iTunes app anymore. For the music part they got the Music app, but for adding and deleting files in your apps you should now use a different method on your Mac. The menu item “import from iTunes” should actually now be called “import from your computer”
It now actually became easier to import the files from your Mac computer and you don’t need an app for this anymore!
These are the steps:
- Connect the iPad to your Mac with a cable.
- Start the Finder app.
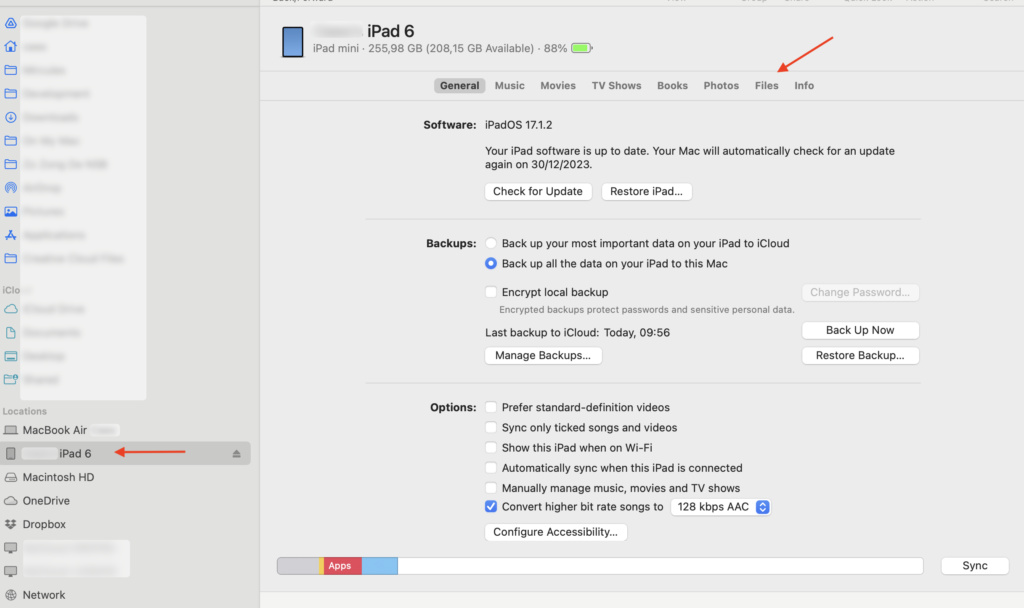
- On the left you will see the name of your iPad popup in the locations list. Click on this.
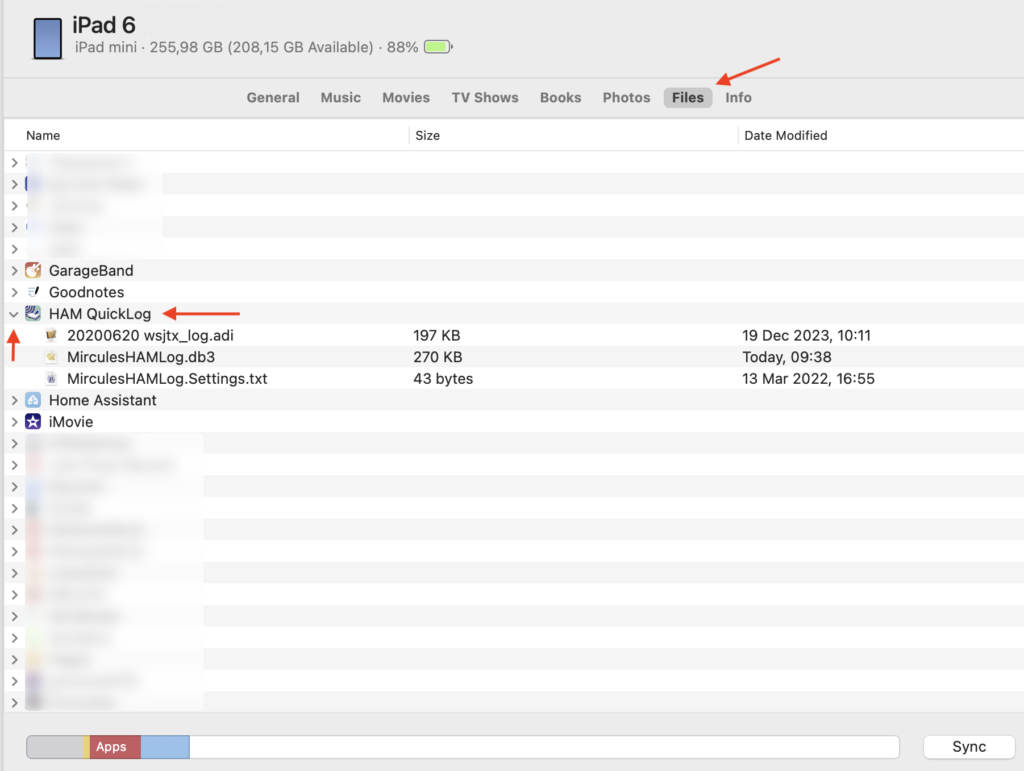
- Click on the “Files” tab on the top of the iPad home screen. After this you will see a list of apps, in which you can also see HAM QuickLog.
- Click on HAM QuickLog. The QuickLog app is now selected.
- Clicking on the little arrow next to the app will show the files that are already on you iPad.
- Drag and drop any ADIF files from your Finder window to the QuickLog app name / area on your screen.
- After they are saved and synchronised, you can disconnect your iPad.
- Now go to “import from iTunes” in HAM QuickLog on your iPad, the same files you just added on the Mac, will now also be shown there.
- These files you can now select and import in the app. They will be imported in the current log file.
I hope this all helps? If you need more help, just let us know!
Some screenshots:
iPad home screen on a Mac computer.

The app list of the iPad, visible on the Mac computer:
